 |
| Download and play Jetfighter The Adventure on Windows 11 |
Jetfighter: The Adventure is a combat flight simulator published in 1988 for the PC/MSDOS platform. This was the beginning of one of THE flight simulation video games that got me into flight simulation back in my early teenage years.
In this post I'm going to describe the process needed to install this very old MSDOS game on a Windows 11 PC platform.
Software needed
Off course we will need several pieces of software, don't worry they're all free in order to install Jetfighter: The Adventure in our PC. Those programs are the following:
1. The game files: This seems to be obvious but still is good to mention. Since this game is, as far as I know, under the abandonware category, it can be found all over the Internet. I personally downloaded it from this link at MEGA.
2. DOSBox: Since the game was released for MSDOS, a now defunct Operative System, we'll need an MSDOS emulator that will give us the right environment to install and play our MSDOS based games. This is a free and open-source program that you can download from its official website.
Installation process
1. Create a folder called DOS right on the root of your hard drive. This will be the virtual C:\ drive inside the DOSBox's MSDOS environment.
2. Enter your newly created DOS folder and create a subfolder called JF.
3. Extract all the game files into the C:\DOS\JF folder. The ones inside the .RAR file you downloaded from Mega.
4. Install DOSBox. This is a straightforward process. Just execute the installation file you downloaded from the official DOSBox website, and basically click "next" on every step until the program completes the installation.
Configuration before you play
Since Jetfighter The Adventure was release in the eighties and was developed for the hardware available at the time, there are some DOSBox configurations we need to take care of before we play the game for the first time.
1. On your windows desktop click on the start icon, the one that looks like the Windows logo, usually located at the left of the toolbar at the bottom of the screen and look for the DOSBox program folder.
2. Look for the DOSBox programs folder and the look for the DOSBox [version number] Options icon and open it. See the following image for reference:
 |
| DOSBox [version number] Options icon |
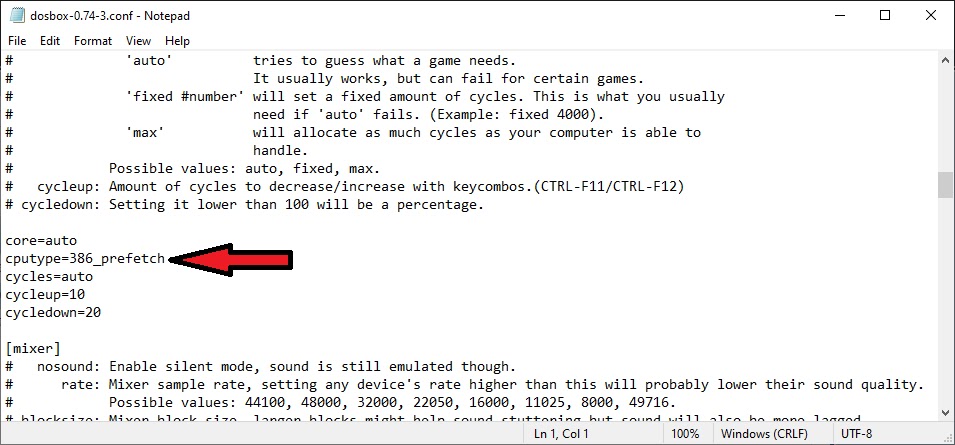
3. Once you click the DOSBox Options icon it will open the main configuration file of the program. Once in the file look the following command line:
cputype=auto
Now edit this line to look as follows:
cputype=386_prefetch
4. Now save all the changes and close the file.
 |
| DOSBox Configuration file |
Play Jetfighter The Adventure on Windows 11
1. Open DOSBox by double clicking on the program's shortcut located on your main desktop screen.
| DOSBox desktop icon |
 |
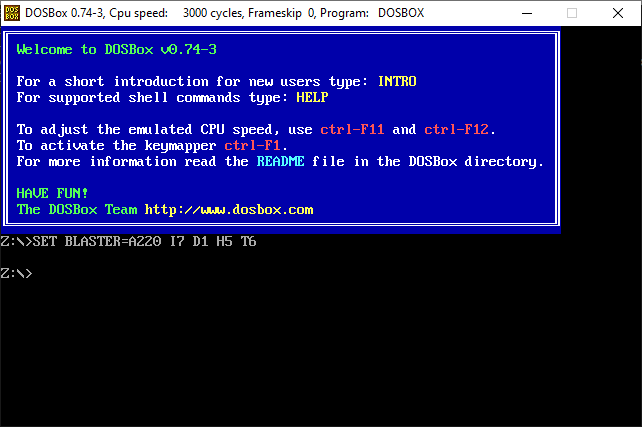
| DOXBox's main screen |
 |
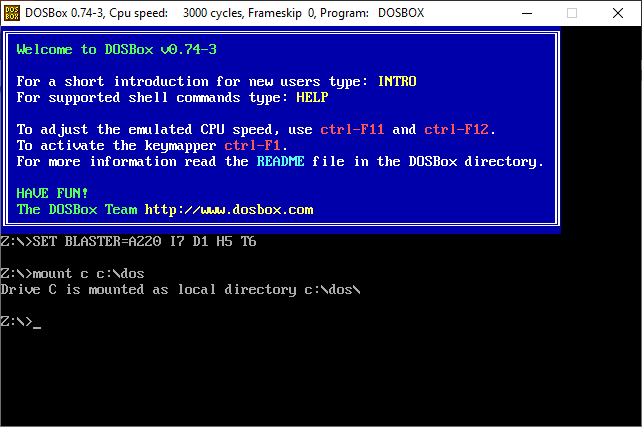
| DOSBox screen after the "Mount C" command |
 |
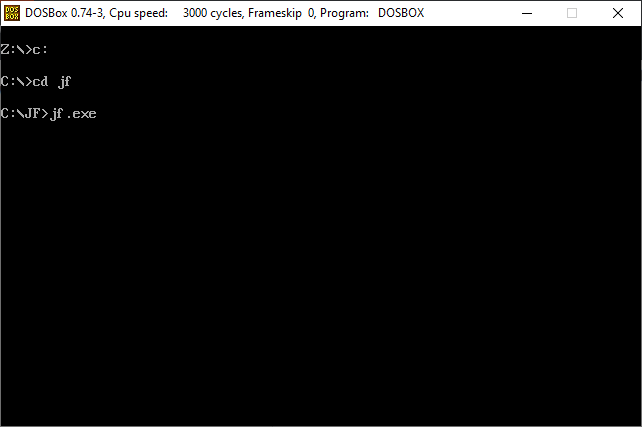
| Entering the game's folder on DOSBox |
If you like the content of this site and have any suggestions, please leave it in the comments section below. Also, don't forget to follow me on my social networks and subscribe to my YouTube Channel.
YouTube | Instagram | TikTok | Discord | Facebook Page


0 comments:
Post a Comment